Change Node Border Color and Thickness
Node styling tools in Mindmup let you control the border color and thickness for individual nodes or apply consistent styling across your entire map. You can make quick visual adjustments without interrupting your workflow.
Change border color using the Quick Menu
When you click a node, a quick menu appears at the top of the screen.
To change the border color:
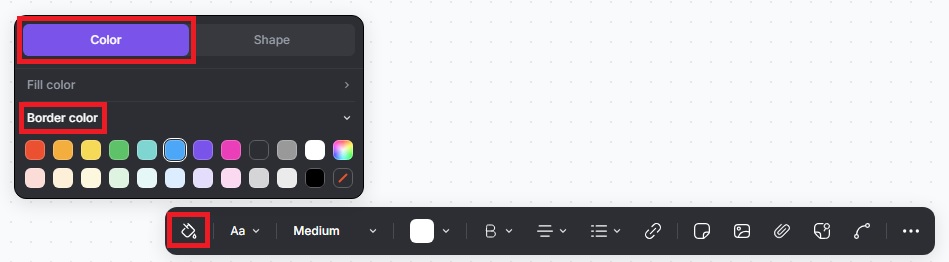
- Click the Paint icon
- Select Border color
This lets you adjust border colors in just a few clicks, without opening extra menus. You can apply the change to a single node or multiple selected nodes.
Change border thickness using the Quick Menu
You can also adjust border thickness directly from the quick menu.
- Click a node to open the quick menu
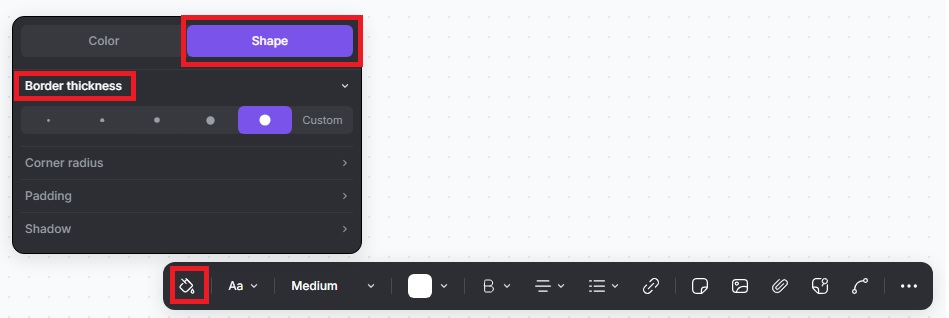
- Click the Paint icon
- Select Shape › Border thickness
- Choose one of the preset options, or customize the thickness
This works for single nodes or multiple selected nodes.
Change border styling for the entire map
If you want consistent styling across your whole map, use the theme settings.
Change global border color
- Click the Customize theme icon
- Go to Color › Global colors
- Select Border color

Change global border thickness
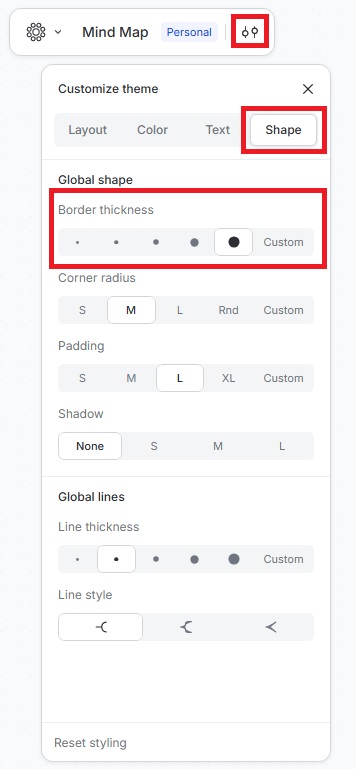
- Click the Customize theme icon
- Go to Shape › Global shape > Border thickness
- Select from the available options, or customize them to match your needs
These settings apply to the entire map, helping you maintain a clean and consistent look.