What Are Concept Maps?
A concept map is a visual way to show relationships between ideas. While concept maps look similar to mind maps, they work differently. Instead of relying on hierarchy and position, concept maps use directional links, labels, and visual attributes to explain how ideas relate.
Concept maps are useful for visualizing knowledge graphs, explaining system relationships, and showing flows or dependencies between concepts.
How Mindmup Makes Concept Mapping Easy
Mindmup provides flexible tools to help you clearly show relationships between concepts, including:
- Different line styles to show connection strength.
- Arrows to indicate direction and flow.
- Captions on lines to explain relationships.
- Colors to group related ideas.
- Text size and line thickness to signal importance.
Mindmup also includes keyboard shortcuts that let you work faster when adding, connecting, and organizing concepts.
Key Tips for Creating Concept Maps with Mindmup
The main difference between concept maps and mind maps is structure. Concept maps don’t follow a parent–child hierarchy. Each idea stands on its own, and relationships are shown through connections between nodes.
Adding Concepts to the Map
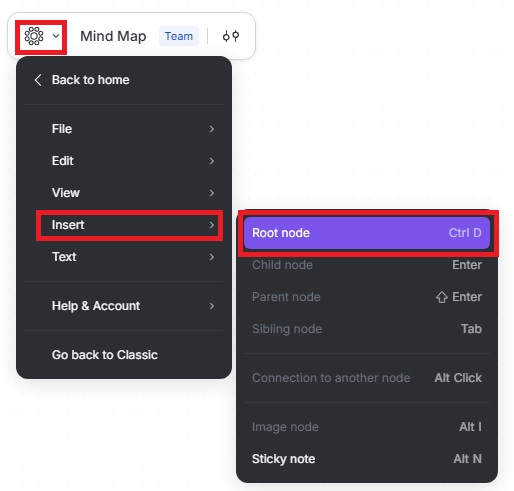
In Mindmup, independent nodes are called root nodes.
To add a new root node:
- Use Insert › Root Node, or
- Press Ctrl + D on your keyboard.
If a root node is selected, pressing Enter adds another root node. If you consistently use Enter, all new nodes will remain independent.
If you accidentally create a parent or child relationship, you can detach the node:
- Click the child node.
- Click the three dots in the pop-up menu.
- Select Detach node.
You can also press D on your keyboard to disconnect the node.
Positioning Nodes
For concept maps, Mindmup does not automatically arrange root nodes. This gives you full control over layout. Simply drag and drop nodes anywhere on the canvas, as long as they don’t overlap.
Showing Relationships
Concept maps often require precise control over relationships.
To connect two nodes:
- Click the node where the relationship starts.
- Click the Connect to another node icon in the floating toolbar.
- Click the node where the relationship ends.
For faster linking between one node and several others:
- Select the start node.
- Hold the Alt key.
- Click each destination node.
Managing Relationship Attributes
To change how a connection looks, click the line. A floating toolbar appears where you can:
- Add a caption.
- Change arrow direction.
- Adjust line style.
- Change line thickness.
You can cycle through arrow options to place arrows on one end, both ends, or remove them entirely.
Removing Relationships
To remove a relationship:
- Click the line.
- Select Delete from the floating toolbar.
You can also remove multiple connections quickly by selecting the start node, holding Alt, and clicking the destination nodes.
Signaling Importance
You can highlight important concepts by adjusting text size or line thickness.
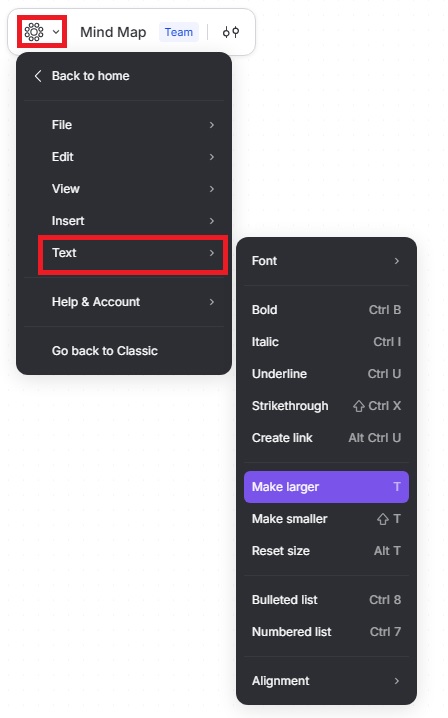
To make text larger:
- Select text, and change size from the floating toolbar. You can also do the same via menu › Text › Make larger.
- Alternatively, press T on your keyboard to increase text size. Press Shift + T to reduce text size. Press Alt + T to reset text to its original size.
To adjust line thickness:
- Click the line.
- Use the floating toolbar to choose the line style, thickness, or arrows.
Keyboard Shortcuts Summary
Ctrl + D — Add a root node
Enter — Add another root node
D — Detach or disconnect a node
Alt + Click — Quickly add or remove relationships
T — Increase node text size
Shift + T — Decrease node text size
Alt + T — Reset node text size
These shortcuts help you build and refine concept maps quickly while keeping full control over structure and relationships.